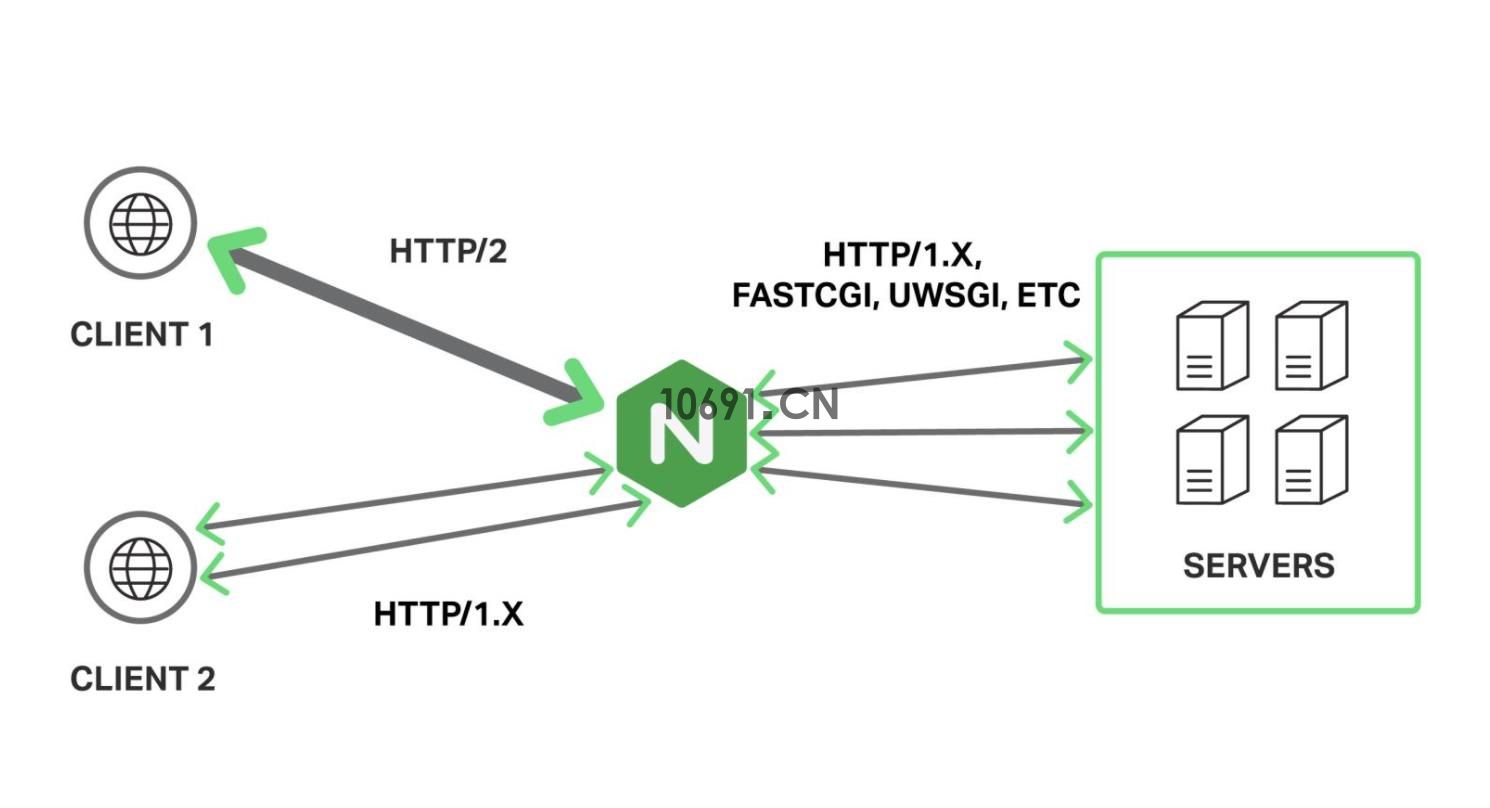
Nginx (engine x) 是一个高性能的HTTP和反向代理web服务器,同时也提供了IMAP/POP3/SMTP服务。Nginx是由伊戈尔·赛索耶夫为俄罗斯访问量第二的Rambler.ru站点(俄文:Рамблер)开发的,第一个公开版本0.1.0发布于2004年10月4日。
其将源代码以类BSD许可证的形式发布,因它的稳定性、丰富的功能集、示例配置文件和低系统资源的消耗而闻名。2011年6月1日,nginx 1.0.4发布。
Nginx是一款轻量级的Web 服务器/反向代理服务器及电子邮件(IMAP/POP3)代理服务器,在BSD-like 协议下发行。其特点是占有内存少,并发能力强,事实上nginx的并发能力在同类型的网页服务器中表现较好,中国大陆使用nginx网站用户有:百度、京东、新浪、网易、腾讯、淘宝等。
环境
1、阿里云ECS
2、CentOS 8 系统
3、NGINX 1.21.0、NGINX 1.21.1稳定版(紧急修复主线程错误)

##依次安装
[root@localhost ~]# yum install gcc-c++ -y
[root@localhost ~]# yum install pcre pcre-devel -y
[root@localhost ~]# yum install zlib zlib-devel -y
[root@localhost ~]# yum install openssl openssl--devel -y
pcre是一个perl库,包括perl兼容的正则表达式库,nginx的http模块使用pcre来解析正则表达式,所以需要安装pcre库。
zlib库提供了很多种压缩和解压缩方式nginx使用zlib对http包的内容进行gzip,所以需要安装。
[root@localhost ~]# wget http://nginx.org/download/nginx-1.21.1.tar.gz
1、解压nginx至指定目录
[root@localhost ~]# tar -zxvf nginx-1.21.1.tar.gz -C /usr/local/

nginx-1.21.1/
nginx-1.21.1/auto/
nginx-1.21.1/conf/
nginx-1.21.1/contrib/
nginx-1.21.1/src/
nginx-1.21.1/configure
nginx-1.21.1/LICENSE
nginx-1.21.1/README
nginx-1.21.1/html/
nginx-1.21.1/man/
nginx-1.21.1/CHANGES.ru
nginx-1.21.1/CHANGES
nginx-1.21.1/man/nginx.8
nginx-1.21.1/html/50x.html
nginx-1.21.1/html/index.html
nginx-1.21.1/src/core/
nginx-1.21.1/src/event/
nginx-1.21.1/src/http/
nginx-1.21.1/src/mail/
nginx-1.21.1/src/misc/
nginx-1.21.1/src/os/
nginx-1.21.1/src/stream/
nginx-1.21.1/src/stream/ngx_stream.c
nginx-1.21.1/src/stream/ngx_stream.h
nginx-1.21.1/src/stream/ngx_stream_access_module.c
nginx-1.21.1/src/stream/ngx_stream_core_module.c
nginx-1.21.1/src/stream/ngx_stream_geo_module.c
nginx-1.21.1/src/stream/ngx_stream_geoip_module.c
nginx-1.21.1/src/stream/ngx_stream_handler.c
nginx-1.21.1/src/stream/ngx_stream_limit_conn_module.c
nginx-1.21.1/src/stream/ngx_stream_log_module.c
nginx-1.21.1/src/stream/ngx_stream_map_module.c
nginx-1.21.1/src/stream/ngx_stream_proxy_module.c
nginx-1.21.1/src/stream/ngx_stream_realip_module.c
nginx-1.21.1/src/stream/ngx_stream_return_module.c
nginx-1.21.1/src/stream/ngx_stream_script.c
nginx-1.21.1/src/stream/ngx_stream_script.h
nginx-1.21.1/src/stream/ngx_stream_set_module.c
nginx-1.21.1/src/stream/ngx_stream_split_clients_module.c
nginx-1.21.1/src/stream/ngx_stream_ssl_module.c
nginx-1.21.1/src/stream/ngx_stream_ssl_module.h
nginx-1.21.1/src/stream/ngx_stream_ssl_preread_module.c
nginx-1.21.1/src/stream/ngx_stream_upstream.c
nginx-1.21.1/src/stream/ngx_stream_upstream.h
nginx-1.21.1/src/stream/ngx_stream_upstream_hash_module.c
nginx-1.21.1/src/stream/ngx_stream_upstream_least_conn_module.c
nginx-1.21.1/src/stream/ngx_stream_upstream_random_module.c
nginx-1.21.1/src/stream/ngx_stream_upstream_round_robin.c
nginx-1.21.1/src/stream/ngx_stream_upstream_round_robin.h
nginx-1.21.1/src/stream/ngx_stream_upstream_zone_module.c
nginx-1.21.1/src/stream/ngx_stream_variables.c
nginx-1.21.1/src/stream/ngx_stream_variables.h
nginx-1.21.1/src/stream/ngx_stream_write_filter_module.c
.......................................
2、创建nginx相关安装目录
##进入源码目录
[root@localhost ~]# cd /usr/local/nginx-1.21.1/
[root@localhost nginx-1.21.1]# ll
总用量 788
drwxr-xr-x 6 1001 1001    326 5月  27 16:06 auto
-rw-r--r-- 1 1001 1001 312146 5月  25 20:29 CHANGES
-rw-r--r-- 1 1001 1001 476381 5月  25 20:29 CHANGES.ru
drwxr-xr-x 2 1001 1001    168 5月  27 16:06 conf
-rwxr-xr-x 1 1001 1001   2590 5月  25 20:28 configure
drwxr-xr-x 4 1001 1001     72 5月  27 16:06 contrib
drwxr-xr-x 2 1001 1001     40 5月  27 16:06 html
-rw-r--r-- 1 1001 1001   1397 5月  25 20:28 LICENSE
drwxr-xr-x 2 1001 1001     21 5月  27 16:06 man
-rw-r--r-- 1 1001 1001     49 5月  25 20:28 README
drwxr-xr-x 9 1001 1001     91 5月  27 16:06 src

##新建nginx目录,并定义你为nginx安装目录
[root@localhost nginx-1.21.1]# mkdir -p /usr/local/nginx
[root@localhost nginx-1.21.1]# cd /usr/local/nginx
[root@localhost nginx]# ll
总用量 0
3、源码编译安装Nginx,指定nginx目录编译安装
##configure后面 使用--prefix参数可以指定nginx安装的目录,源码的安装一般由3个步骤组成:配置(configure)、编译(make)、安装(make install)
[root@localhost nginx-1.21.1]# ./configure

checking for OS
 + Linux 4.18.0-193.el8.x86_64 x86_64
checking for C compiler ... found
 + using GNU C compiler
 + gcc version: 8.3.1 20191121 (Red Hat 8.3.1-5) (GCC)
checking for gcc -pipe switch ... found
checking for -Wl,-E switch ... found
checking for gcc builtin atomic operations ... found
checking for C99 variadic macros ... found
checking for gcc variadic macros ... found
checking for gcc builtin 64 bit byteswap ... found
checking for unistd.h ... found
checking for inttypes.h ... found
checking for limits.h ... found
checking for sys/filio.h ... not found
checking for sys/param.h ... found
checking for sys/mount.h ... found
checking for sys/statvfs.h ... found
checking for crypt.h ... found
checking for Linux specific features
checking for epoll ... found
checking for EPOLLRDHUP ... found
checking for EPOLLEXCLUSIVE ... found
checking for eventfd() ... found
checking for O_PATH ... found
checking for sendfile() ... found
checking for sendfile64() ... found
checking for sys/prctl.h ... found
checking for prctl(PR_SET_DUMPABLE) ... found
checking for prctl(PR_SET_KEEPCAPS) ... found
checking for capabilities ... found
checking for crypt_r() ... found
checking for sys/vfs.h ... found
checking for nobody group ... found
checking for poll() ... found
checking for /dev/poll ... not found
checking for kqueue ... not found
checking for crypt() ... not found
checking for crypt() in libcrypt ... found
checking for F_READAHEAD ... not found
checking for posix_fadvise() ... found
checking for O_DIRECT ... found
checking for F_NOCACHE ... not found
checking for directio() ... not found
checking for statfs() ... found
checking for statvfs() ... found
checking for dlopen() ... not found
checking for dlopen() in libdl ... found
checking for sched_yield() ... found
checking for sched_setaffinity() ... found
checking for SO_SETFIB ... not found
checking for SO_REUSEPORT ... found
checking for SO_ACCEPTFILTER ... not found
checking for SO_BINDANY ... not found
checking for IP_TRANSPARENT ... found
checking for IP_BINDANY ... not found
checking for IP_BIND_ADDRESS_NO_PORT ... found
checking for IP_RECVDSTADDR ... not found
checking for IP_SENDSRCADDR ... not found
checking for IP_PKTINFO ... found
checking for IPV6_RECVPKTINFO ... found
checking for TCP_DEFER_ACCEPT ... found
checking for TCP_KEEPIDLE ... found
checking for TCP_FASTOPEN ... found
checking for TCP_INFO ... found
checking for accept4() ... found
checking for int size ... 4 bytes
checking for long size ... 8 bytes
checking for long long size ... 8 bytes
checking for void * size ... 8 bytes
checking for uint32_t ... found
checking for uint64_t ... found
checking for sig_atomic_t ... found
checking for sig_atomic_t size ... 4 bytes
checking for socklen_t ... found
checking for in_addr_t ... found
checking for in_port_t ... found
checking for rlim_t ... found
checking for uintptr_t ... uintptr_t found
checking for system byte ordering ... little endian
checking for size_t size ... 8 bytes
checking for off_t size ... 8 bytes
checking for time_t size ... 8 bytes
checking for AF_INET6 ... found
checking for setproctitle() ... not found
checking for pread() ... found
checking for pwrite() ... found
checking for pwritev() ... found
checking for strerrordesc_np() ... not found
checking for sys_nerr ... found
checking for localtime_r() ... found
checking for clock_gettime(CLOCK_MONOTONIC) ... found
checking for posix_memalign() ... found
checking for memalign() ... found
checking for mmap(MAP_ANON|MAP_SHARED) ... found
checking for mmap("/dev/zero", MAP_SHARED) ... found
checking for System V shared memory ... found
checking for POSIX semaphores ... not found
checking for POSIX semaphores in libpthread ... found
checking for struct msghdr.msg_control ... found
checking for ioctl(FIONBIO) ... found
checking for ioctl(FIONREAD) ... found
checking for struct tm.tm_gmtoff ... found
checking for struct dirent.d_namlen ... not found
checking for struct dirent.d_type ... found
checking for sysconf(_SC_NPROCESSORS_ONLN) ... found
checking for sysconf(_SC_LEVEL1_DCACHE_LINESIZE) ... found
checking for openat(), fstatat() ... found
checking for getaddrinfo() ... found
checking for PCRE library ... found
checking for PCRE JIT support ... found
checking for zlib library ... found
creating objs/Makefile

Configuration summary
  + using system PCRE library
  + OpenSSL library is not used
  + using system zlib library

  nginx path prefix: "/usr/local/nginx"
  nginx binary file: "/usr/local/nginx/sbin/nginx"
  nginx modules path: "/usr/local/nginx/modules"
  nginx configuration prefix: "/usr/local/nginx/conf"
  nginx configuration file: "/usr/local/nginx/conf/nginx.conf"
  nginx pid file: "/usr/local/nginx/logs/nginx.pid"
  nginx error log file: "/usr/local/nginx/logs/error.log"
  nginx http access log file: "/usr/local/nginx/logs/access.log"
  nginx http client request body temporary files: "client_body_temp"
  nginx http proxy temporary files: "proxy_temp"
  nginx http fastcgi temporary files: "fastcgi_temp"
  nginx http uwsgi temporary files: "uwsgi_temp"
  nginx http scgi temporary files: "scgi_temp"
  配置成功
执行编译并安装
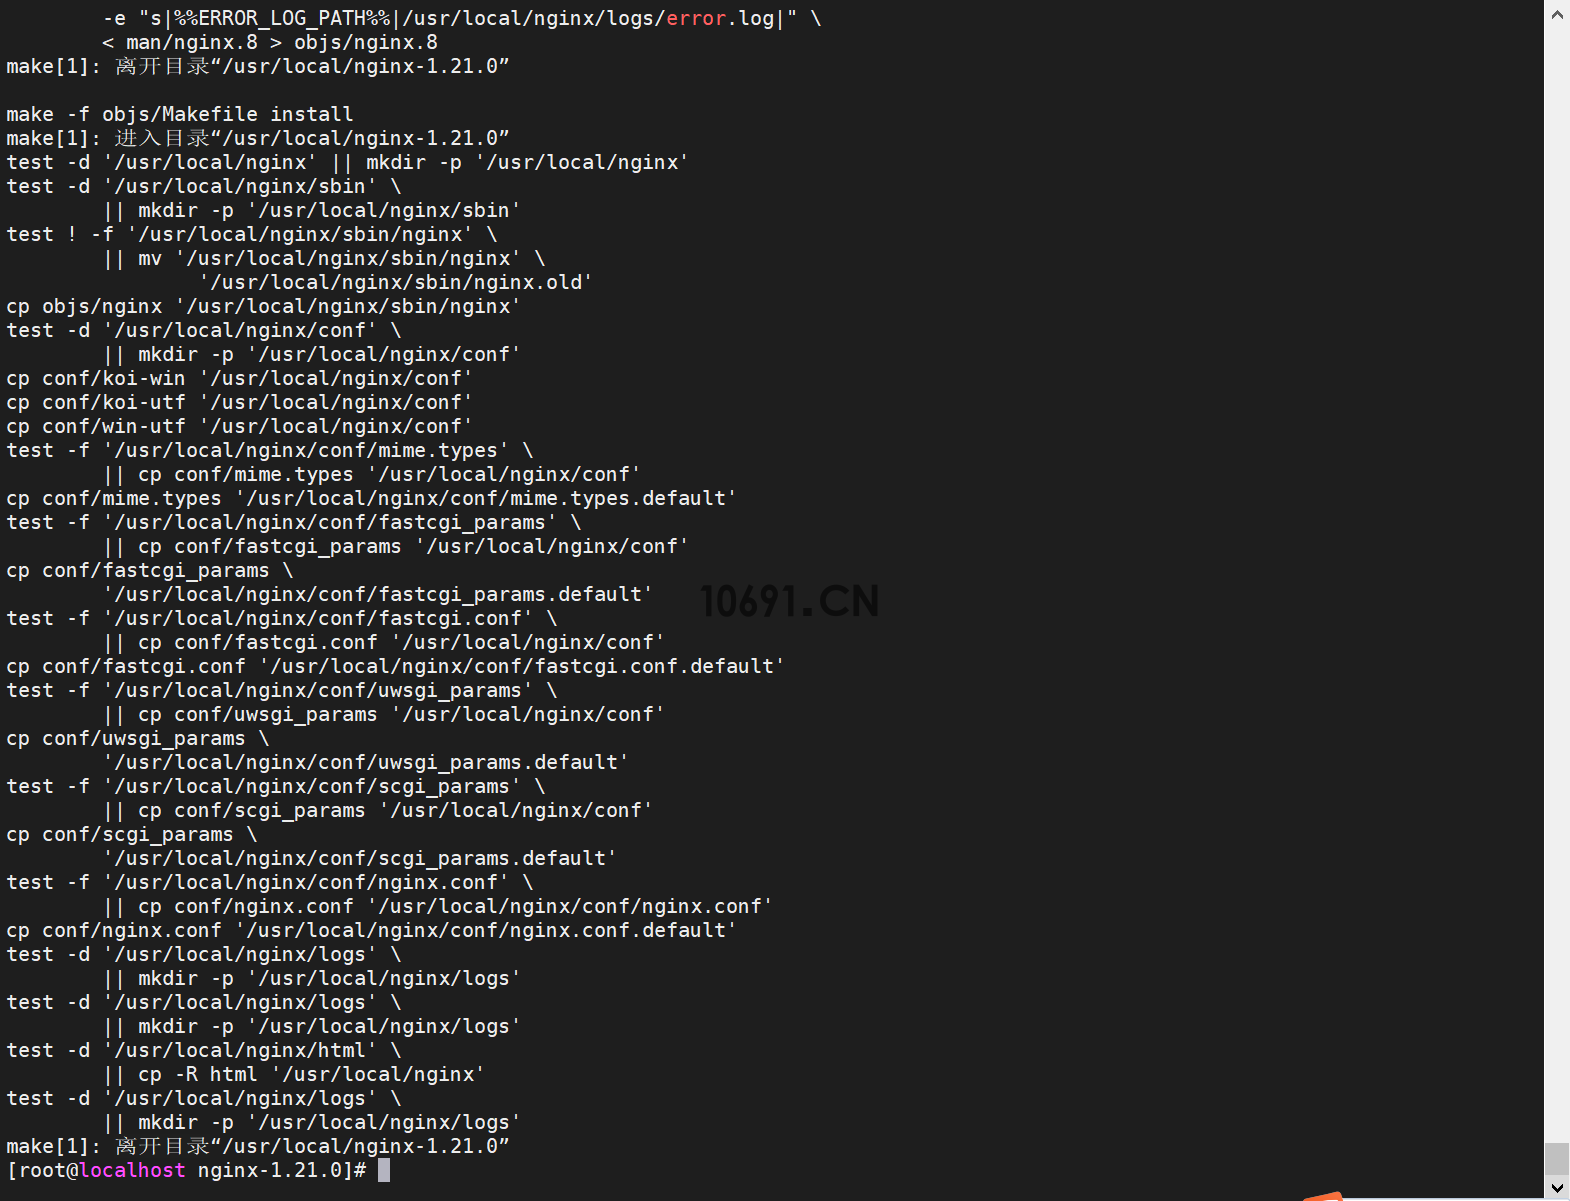
[root@localhost ~]# make && make install

##下图无报错即安装完毕
4、源码编译安装Nginx常用命令
[root@localhost nginx-1.21.1]# whereis nginx     //搜索nginx安装目录
nginx: /usr/local/nginx

[root@localhost nginx-1.21.1]# /usr/local/nginx/sbin/nginx     //nginx启动脚本

[root@localhost nginx-1.21.1]# /usr/local/nginx/sbin/nginx -s reload     //nginx重载配置

[root@localhost nginx-1.21.1]# /usr/local/nginx/sbin/nginx -s -stop     //nginx停止
nginx: invalid option: "-s -stop"

[root@localhost nginx-1.21.1]# /usr/local/nginx/sbin/nginx -t     //nginx检测配置可用性
[root@localhost nginx-1.21.1]# ps -ef | grep nginx //查看nginx进程
root 44892 1 0 16:24 ? 00:00:00 nginx: master process /usr/local/nginx/sbin/nginx
nobody 44937 44892 0 16:24 ? 00:00:00 nginx: worker process
root 45037 2492 0 16:25 pts/1 00:00:00 grep --color=auto nginx至此,阿里云ECS Centos 8系统编译安装Nginx1.21.1新版
5、源码编译安装Nginx开机自启动配置
第一步:进入到/lib/systemd/system/目录
[root@localhost ~]# cd /lib/systemd/system/第二步:创建nginx.service文件,并编辑
[root@localhost ~]# vim /lib/systemd/system/nginx.service[Unit]
Description=nginx service
After=network.target
[Service]
Type=forking
ExecStart=/usr/local/nginx/sbin/nginx ##nginx安装目录为/usr/local/nginx/
ExecReload=/usr/local/nginx/sbin/nginx -s reload
ExecStop=/usr/local/nginx/sbin/nginx -s quit
PrivateTmp=true
[Install]
WantedBy=multi-user.target[Unit]服务的说明Description:描述服务
After:描述服务类别 Service服务运行参数的设置 Type=forking是后台运行的形式 ExecStart为服务的具体运行命令 ExecReload为重启命令 ExecStop为停止命令 PrivateTmp=True表示给服务分配独立的临时空间 注意:Service的启动、重启、停止命令全部要求使用绝对路径 Install运行级别下服务安装的相关设置,可设置为多用户,即系统运行级别为3
保存退出。
第三步:加入开机自启动
[root@localhost ~]# systemctl enable nginx如果不想开机自启动了,可以使用下面的命令取消开机自启动
[root@localhost ~]# systemctl disable nginx第四步:服务的启动/停止/刷新配置文件/查看状态
[root@localhost ~]#  systemctl start nginx.service         启动nginx服务 #
[root@localhost ~]#  systemctl stop nginx.service      停止服务 #
[root@localhost ~]#  systemctl restart nginx.service     重新启动服务 #
[root@localhost ~]#  systemctl list-units --type=service   查看所有已启动的服务 #
[root@localhost ~]#  systemctl status nginx.service      查看服务当前状态 #
[root@localhost ~]#  systemctl enable nginx.service      设置开机自启动 #
[root@localhost ~]#  systemctl disable nginx.service     停止开机自启动
一个常见的错误
**Warning: nginx.service changed on disk. Run 'systemctl daemon-reload' to reload units.**直接按照提示执行命令systemctl daemon-reload 即可。
[root@localhost ~]# systemctl daemon-reload侦听端口
server {

# Standard HTTP Protocol

listen 80;

# Standard HTTPS Protocol

listen 443 ssl;

# For http2

listen 443 ssl http2;

# Listen on 80 using IPv6

listen [::]:80;

# Listen only on using IPv6

listen [::]:80 ipv6only=on;

}
访问日志
server {

# Relative or full path to log file

access_log /path/to/file.log;

# Turn 'on' or 'off'

access_log on;

}
域名
server {

# Listen to 10691.cn

server_name 10691.cn;

# Listen to multiple domains server_name 10691.cn www.10691.cn;

# Listen to all domains

server_name *.10691.cn;

# Listen to all top-level domains

server_name yourdomain.*;

# Listen to unspecified Hostnames (Listens to IP address itself)

server_name "";

}
静态资产
server {

listen 80;

server_name 10691.cn;

location / {

root /path/to/website;

}

}
重定向
server {

listen 80;

server_name www.10691.cn;

return 301 http://10691.cn$request_uri;

}

server {

listen 80;

server_name www.10691.cn;

location /redirect-url {

return 301 http://otherdomain.com;

}

}
反向代理
server {

listen 80;

server_name 10691.cn;

location / {

proxy_pass http://0.0.0.0:3000;

# where 0.0.0.0:3000 is your application server (Ex: node.js) bound on 0.0.0.0 listening on port 3000

}

}
负载均衡
upstream node_js {

server 0.0.0.0:3000;

server 0.0.0.0:4000;

server 123.131.121.122;

}

server {

listen 80;

server_name 10691.cn;

location / {

proxy_pass http://node_js;

}

}
SSL 协议
server {

listen 443 ssl;

server_name 10691.cn;

ssl on;

ssl_certificate /path/to/cert.pem;

ssl_certificate_key /path/to/privatekey.pem;

ssl_stapling on;

ssl_stapling_verify on;

ssl_trusted_certificate /path/to/fullchain.pem;

ssl_protocols TLSv1 TLSv1.1 TLSv1.2;

ssl_session_timeout 1h;

ssl_session_cache shared:SSL:50m;

add_header Strict-Transport-Security max-age=15768000;

}
# Permanent Redirect for HTTP to HTTPS

server

{

listen 80;

server_name 10691.cn;

return 301 https://$host$request_uri;

}
其实可以采用可视化的方式对 Nginx 进行配置,我在 GitHub 上发现了一款可以一键生成 Nginx 配置的神器,相当给力。
先来看看它都支持什么功能的配置:反向代理、HTTPS、HTTP/2、IPv6, 缓存、WordPress、CDN、Node.js 支持、 Python (Django) 服务器等等。
如果你想在线进行配置,只需要打开网站:https://nginxconfig.io/,按照自己的需求进行操作就行了。
选择你的场景,填写好参数,系统就会自动生成配置文件。
提示:如遇链接失效,请在评论区留言反馈